15 October 2019
A quick and simple window LED display using WS2812 LED lights controlled by the ever popular Arduino UNO.
My Links: Engrave | D.tube | Actifit | Exhaust | Endomondo
WS2812 LED Window Display DIY

from: pixabay.com /images/search/pumpkin/
I actually built this as a Christmas Project, colours Red/Green as the theme, but today it's for Halloween and Orange is the preferred colour.
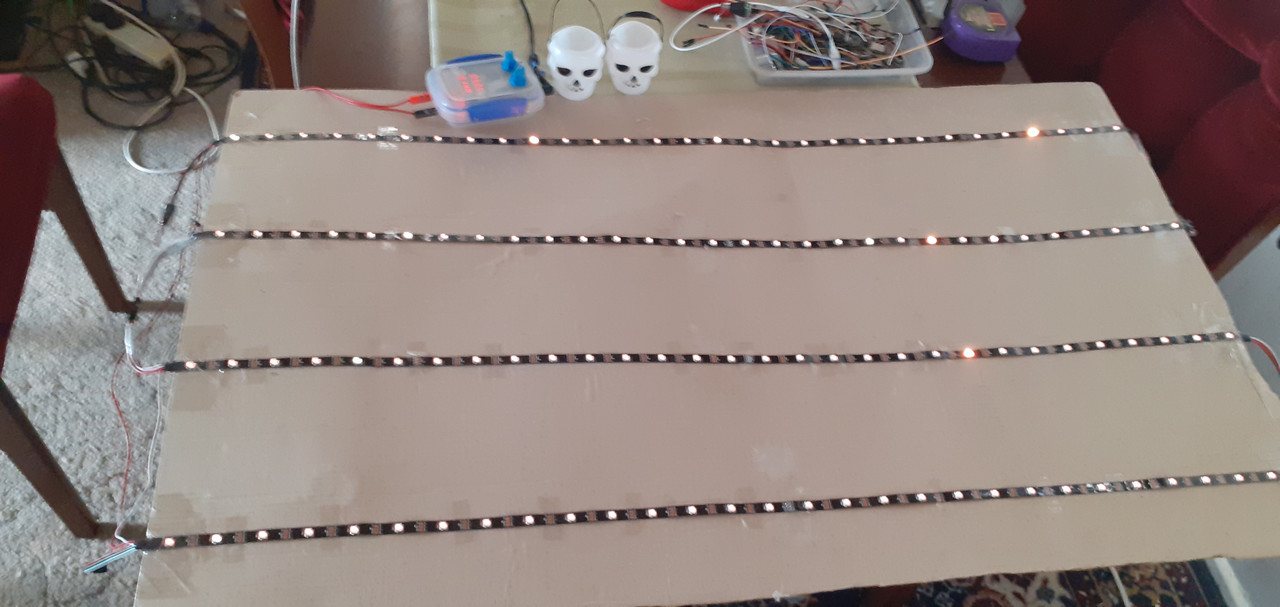
You only need:-
- WS2812B Strip LED Lights 5050 30 LED/M IC Individual Addressable DC5V
- Arduino UNO (compatibles fine)
- 5V 1A Power Supply
- A base to mount everything (I used the side of a cardboard box).
- A little bit of wiring and soldering required
I would use some type of clear acrylic sheet if I decide to make a more permanent project, this would at least give some more visibility through the window.
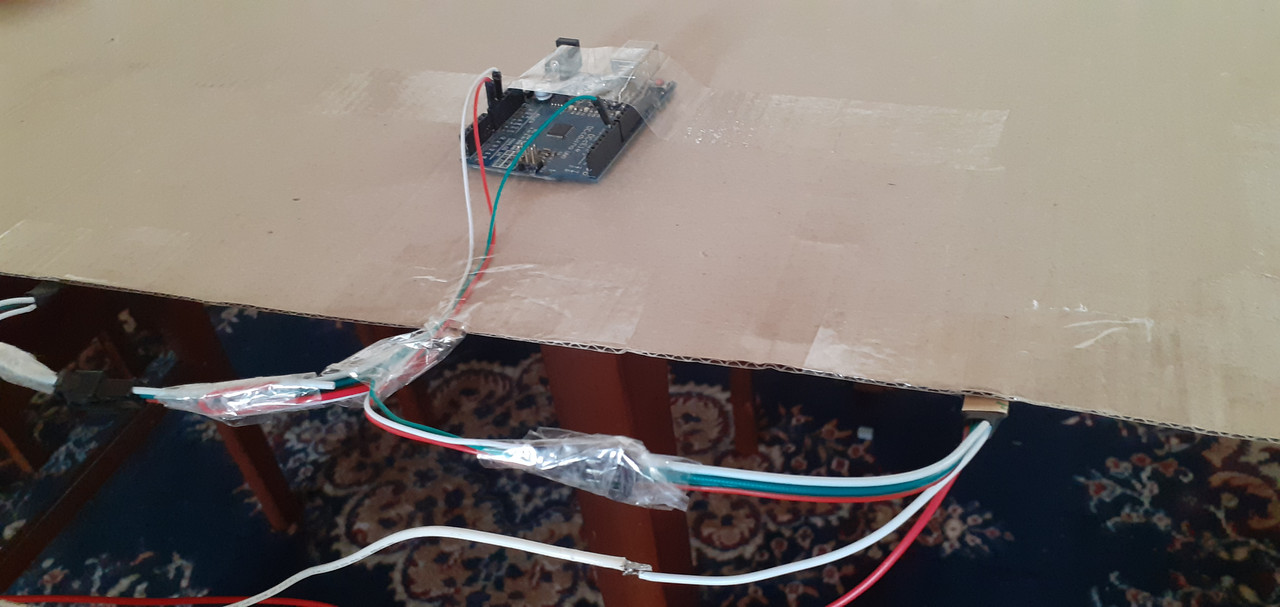
The Arduino Uno is mounted on the flip side with that magic sellotape, which I also used to seal around the connectors for added strength.
You can download the sketch for the link below. This sketch relies on the FastLED library. Also there are many included colour combinations that have been commented out so have fun and change the code, experiemnt.
If you are new to Arduino there is many tutorials found on Youtube.
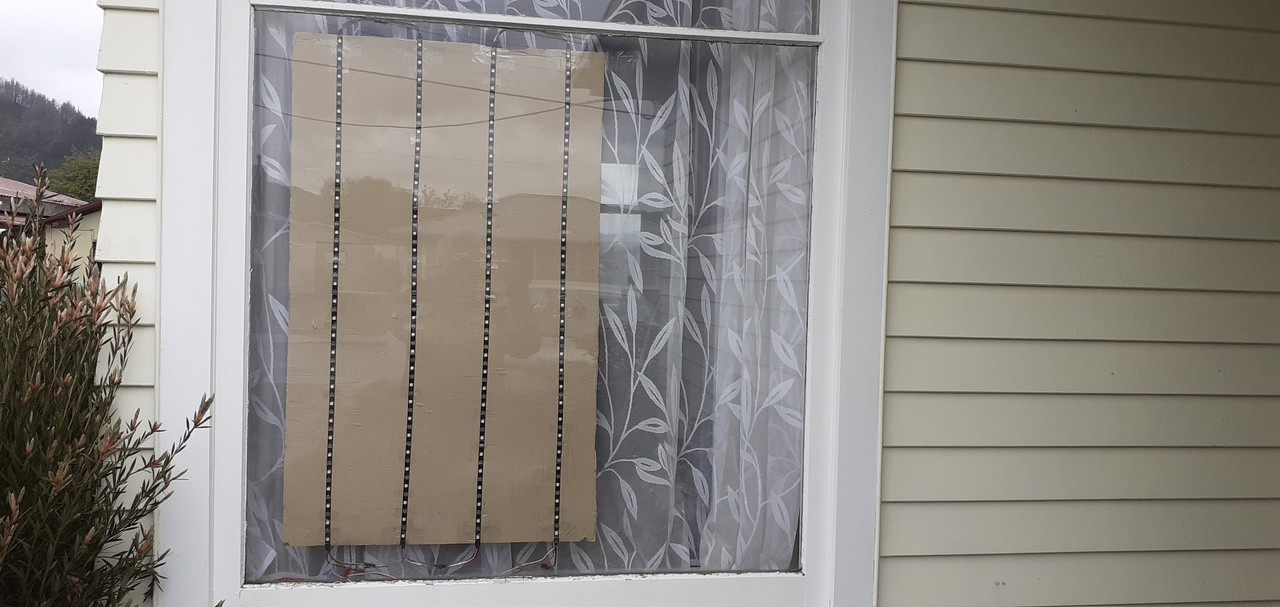
And here it is, taped to the inside of a window again with sellotape. It really is quite bright at night.
Watch the D.tube video, see what the display looks like at night time, the link is below.
- Sources:
- Arduino Sketch 20191015_HalloweenWindowLights.zip Download
- Youtube Cine-Lights Creator of IDE Code
- Video on D.tube WS2812 LED Window Display DIY

| COIN | Cryptocurrency Wallet Support |
|---|---|
| STEEM | 0x4493de75192e5210091c71506465E31BF5038338 |
| ETH | 0x23Bd7B699383D96513636bf145dCc272a1502076 |

- with every post comes experience, as we strive to do better
- upvote to 80% voting mana, let's encourage and inspire each other